Installation
Installing the current development version
The plugin repository is updated frequently. However, it is not guaranteed that it will contain the same code that can be found in the GitHub repository. If you want to be sure that you are using the latest development version, follow the steps described in the Setting up the OpenGeo Explorer code for development section.
Installing from a zip file
If you have a copy of the plugin code in a zip file, you can install it unzipping it into the QGIS plugins folder. In Windows, it should be something like C:\Users\<your_user>\.qgis2\python\plugins. In Linux/Mac, it should be in ~/.qgis2/python/plugins. Copy the opengeo folder in your zip file into your plugins folder. You should end up having a .qgis2\python\plugins\opengeo folder with the code of the plugin and the required subfolders. The plugin.py file should be on that folder.
Version support and limitations
This plugin is targeted at the elements of OpenGeo Suite, and it is tested with the versions of those element included in the latest release of the Suite (4.0). However, you can use most of the functionality if you are using individual installations of elements such as GeoServer and PostGIS.
The current version of the plugin is targeted at GeoServer 2.3.x. If you are using an older version, you might encounter some problems, and some elements might not be correctly configured due to differences in the way they are handled by GeoServer or in changes in the REST API that the plugin uses to communicate with GeoServer. Although most things should work fine if connecting to a GeoServer 2.2.x catalog, the following are some of the incompatibilities that have been detected.
- Empty groups. Layers belonging to a group are not found, since the group definition has a different structure
- Styles belonging to a given namespace are not found. Only styles with no namespace are reported if using GeoServer 2.2.x
To check the version of your catalog, just select the catalog in the tree and look at the description tab.
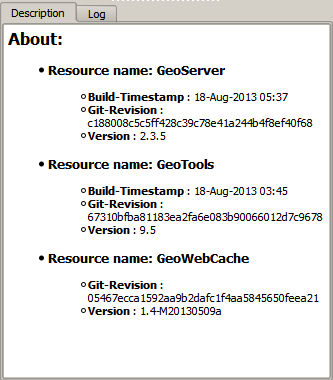
If you do not see information like that, it is likely that your catalog uses a GeoServer version that doesn’t support that operation. In this case, it will not support the other operations that cause problems, so you will probably find some issues when working with the catalog through the plugin.
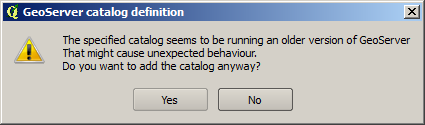
When connecting to a catalog, the explorer tries to check the version. If it cannot detect the version or it cannot confirm it is the target version, it will ask you before adding the catalog.
Even if you are using the correct version of GeoServer, some limitations still exists. Below is a list of know limitations and issues than might appear.
CRS. GeoServer might encounter problems when a custom CRS is used in QGIS. The CRS definition that works correctly when rendering the layer in QGIS might not work when importing the layer into GeoServer. Usually this results in a layer that is published but doesn’t have a CRS set and is not enabled. You can correct that manually, selecting the layer in the Explorer tree and modifying its CRS.
Notice that layers are imported using the SRS defined in the original data source (i.e., the prj file if using a shapefile). Setting a different CRS using the Set Layer CRS option in the QGIS TOC will not have any effect when importing the layer into GeoServer, unless you save the layer with that CRS and the CRS definition is stored along with the layer data.
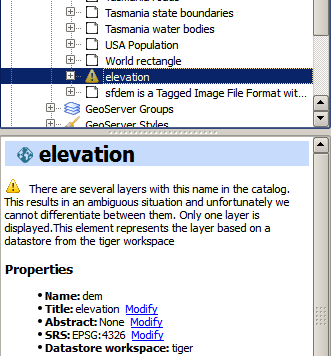
Layer names. The OpenGeo Explorer uses the GeoServer REST API to get the list of layers in a catalog. The REST API describes layers without workspace, that meaning that if you have two layers with the same name and in different workspaces (for instance, ws1:mylayer and ws2:mylayer), they will be shown as just one (mylayer in this case).
When this happens, the situation is ambiguous and OpenGeo Explorer cannot differentiate between layers with the same name but belonging to different workspaces. The layer, as describe by the REST API, is added to the Explorer tree, but it only represents one of the several layers that share the same name. To indicate this, the layer is shown with a warning icon, and a warning message is displayed in the layer description.
Another important limitation is due to the different versions of the SLD standard that QGIS and GeoServer support. Read the Styling limitations section to know more about it.
Installing Steps
This section will describe how to install the OpenGeo Suite for QGIS plugin.
The OpenGeo Suite plugin requires QGIS version 2.0 or higher to run. It is installed using the Plugin Manager.
Navigate to Plugins ‣ Manage and Install Plugins.
Click Settings
As the plugin is still in development, it is tagged as “experimental.” Check the box that says Show also experimental plugins.
In the list of Plugin repositories, click Add.
Add the following repository to the list of plugin repositories:
- Name: Boundless plugin repository
- URL: http://qgis.boundlessgeo.com/plugins.xml
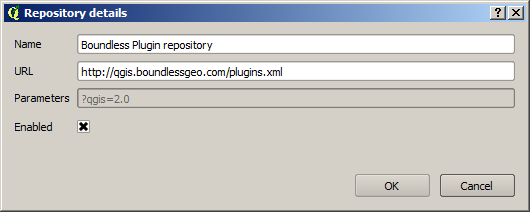
Adding a new plugin repository
Click OK.
Now the OpenGeo Suite plugin should be available and ready to be installed.

New plugin repository added successfully
Click Get More to see a list of new plugins that can be installed.
You should see one titled OpenGeo Explorer. Click Install plugin.
Note
If you don’t see the plugin, ensure that you checked Show also experimental plugins.
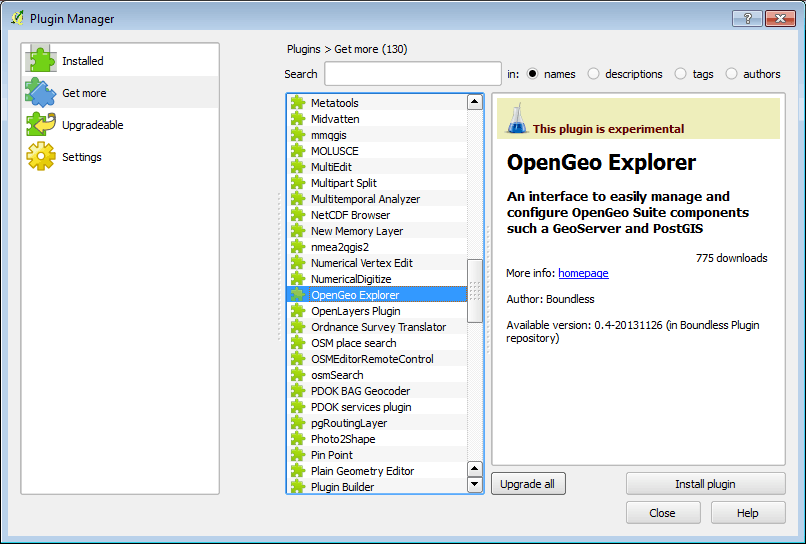
OpenGeo in the list of plugins
The plugin will be downloaded and installed. To verify that installation was successful, you should see a new menu in the menu bar called OpenGeo.
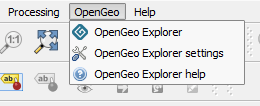
OpenGeo menu